Installation
Once you have purchased the plugin and downloaded the ZIP, go to your Plugins section > Add New.
Configuration
Oncewe have the plugin installed, we mustconfigure it so that the products are imported into Holded. To do this, we need to follow these steps:
- We go to WooCommerce > Connect Holded .
- We activate the license that will facilitate plugin updates in the License Activation menu.
- We will also need to add the Holded API Key. In settings, we enter the Holded API Key (instructions on how to get it below).
- In Settings, we have different options for inventory, product filtering, rates and order generation in Holded.
- We can now perform product synchronization and import. Under Product synchronization > Start import .
- In Automation you set the time settings for product synchronization .


How to get Holded API Key
Here are the steps you need to follow to get the Holded API Key to enter it in the plugin settings in WordPress and connection is possible.
- Inside your account, click on your company name.
- Go to your profile > settings.
- Go to the system section and access the “Developers” section.
- Click on the API Key section and copy it.
PDF layout
Now we can choose the layout of the PDF that generates the document in Holded. This allows us to have a different layout in your online store. So far Holded does not provide us by programming the types of design that an account has, this makes us need to do some steps that normally would not be necessary if we were given such information. We have already reported it, hopefully they will answer us soon 🧐.
How is it done, by following the steps below:
- In the top right section, Settings > Billing, you have the template creation section.
- We give right mouse button and option inspect, in the right or bottom bar you get a source code information. The data that there is in data-id, is the id of the design.
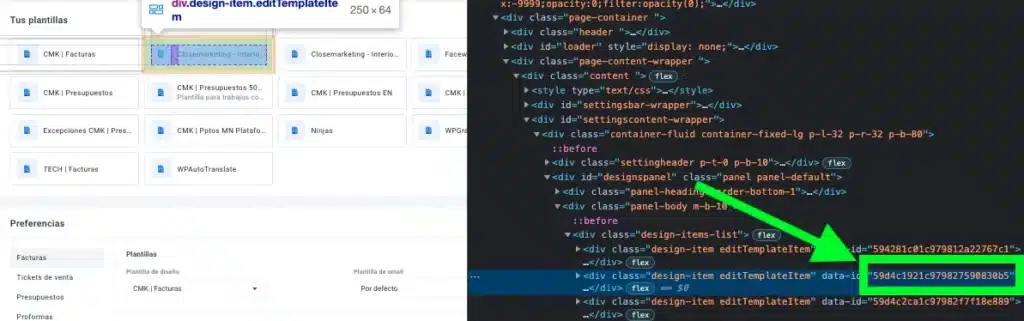
3. This ID, we copy and paste it in the options of our plugin.